How to remove and attach covers for your PS5 console

Find out how to change the covers on your PlayStation®5 console.

Remove the covers when installing an M.2 SSD, attaching a disc drive, or when replacing your covers.

Safety

Before removing or attaching the covers, please read the following safety precautions.

Caution

  • Keep out of reach of young children. Young children may swallow small parts which may inflict injury. 
  • After you have turned off your PS5® console and unplugged the AC power cord and cables, wait for your console to cool down before removing and attaching the covers. The main unit of your PS5 console may still be hot immediately after use, and continued handling of your console may cause burns. 
  • Be careful not to pinch your fingers in the gaps between parts, and not to hurt your hands and fingers on the corner of parts. 
  • When turning on your console, make sure the covers are installed correctly. If the covers are not installed correctly, it may cause the main unit to overheat.

How to remove and replace the covers on your PS5 console

First, check the model number of your PS5® console.

Select your model of PS5 console from the list below for instructions.

Place your console on a soft cloth spread over a flat surface before removing or attaching the covers.

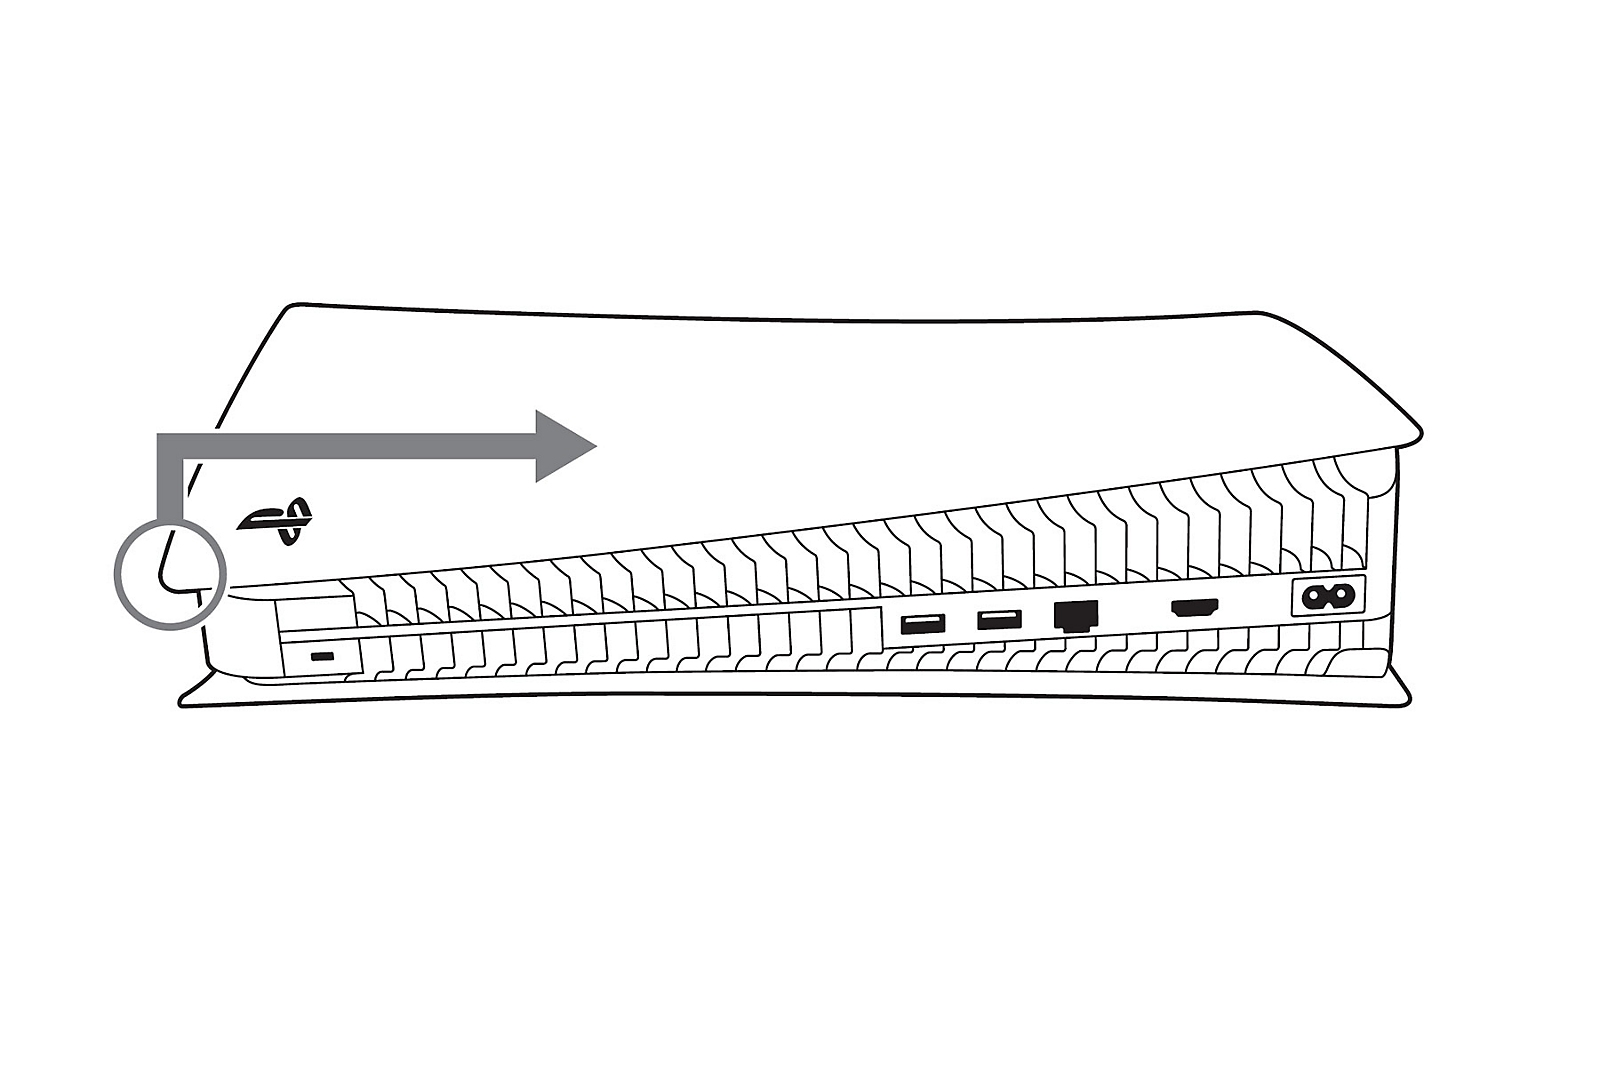
Each cover has different shapes. To ensure you attach the cover in the correct position, use the action button marks on the inside of the cover as a guide.

All covers can be removed and attached in the same way.

  1. Go to the control centre and select Power > Turn Off PS5.
    The screen goes blank, the power indicator flashes white, and then turns off. 
  2. Remove the AC power cord and cables, and then wait for the PS5 console to cool down.
    The main unit of your console is hot immediately after use. 
  3. Place the console with the bottom facing up and the front side facing you, and then remove the feet. 
  4. Remove the cover.
    Slightly lift the cover away from the console to detach its clips and remove it.
  1. Attach the cover.
    Align the cover’s clips with the corresponding holes on the console and push in until you hear a “click”.
  1. Attach the feet, connect the AC power cord and cables, and then turn on the power.

Remove the top cover

The top PS5 console cover has a PlayStation Logo. 

  1. Go to the control centre and select Power > Turn Off PS5.
    The screen goes blank, the power indicator flashes white, and then turns off.
  2. Remove the AC power cord and cables, and then wait for the PS5 console to cool down.
    The main unit of your console is hot immediately after use.
  3. Remove the base.
  4. Position your PS5 console so that the PS logo is facing up and the power button is facing away from you. 
  5. Grip the bottom left corner of the cover and remove it by slightly pulling up and to your right.
    The cover lifts away.
  1. Attach the new top cover by sliding it on from right to left.
    You'll hear a click when the cover is secured.
  1. Connect the AC power cord, cables and base, and then turn on the power.
    Or, to attach a new bottom cover, follow the steps below.

Remove the bottom cover

The bottom PS5 console cover doesn’t have a PlayStation Logo.

  1. Go to the control centre and select Power Turn Off PS5.
    The screen goes blank, the power indicator flashes white, and then turns off.
  2. Remove the AC power cord and cables, and then wait for the PS5 console to cool down.
    The main unit of your console is hot immediately after use.
  3. Remove the base.
  4. Position your PS5 console so that the PlayStation logo is facing down and the power button is facing towards you.
  5. Grip the top left corner of the cover and remove it by slightly pulling up and to your right.
    The cover lifts away.
  1. Attach the new bottom cover by sliding it on from right to left.
    You hear a click when the cover is secured.
  1. Connect the AC power cord, cables and base, and then turn on the power.

Need help? 

Contact our support specialists